🧠 Overview
This feature allows you to quickly and efficiently import multiple accounts into the system at once, saving time and minimizing manual entry. Whether you’re setting up a new project, migrating from another platform, or managing large datasets, bulk import streamlines the process with just a few steps.
In this article, we’ll walk you through how to prepare your data, upload it correctly, and avoid common issues.
🧭 Accessing the Bulk Import Feature
On the Left corner of the software, you’ll see the Bulk Import Accounts option.

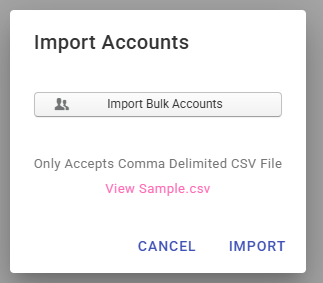
After clicking the menu, a pop-up will appear with options to view a sample file or import your accounts using a CSV file.
📄 CSV File Format Requirements
It’s important to note that your CSV file should be in Comma delimited format, also known as comma-separated values (CSV). This is a plain text format used to store tabular data separated by commas. Other Excel formats will not work with this option.

Your CSV file must have 7 columns, with the first row containing column headers. The bot will skip the first row, but it must be present to ensure blank fields are processed correctly.
- deviceid – Enter your device ID. If it doesn’t exist in the bot, it will be created automatically.
- username – Username of the account.
- password – Password of the account.
- appid – APP ID should be filled, and the default should be
*com.instagram.android*if you are not using clones. - start_hour – For the account start hour, use whole numbers or full hour-minute formats (e.g.,
1,1:30). Only 24-hour format is accepted. You can set multiple timers separated by commas (e.g.,1,4,7or1:30,4:30,8). Do not include spaces or periods. - end_hour – Use the same format as the start time for the stop time—this defines when the bot stops working for that account. Use 24-hour format with no spaces or periods (e.g.,
2,5,9or2:30,5:30,9). - 2fa_setup_code – If your account has 2FA enabled, enter your 2FA setup key here so the bot can automatically generate and fill in the codes. Leave this blank if 2FA is not enabled on your account.
🚀 Importing Your CSV File
Once your CSV file is ready, click the Import Bulk Accounts button in the popup, select your file, and click Import. Wait for the bot to finish the import process after clicking.
✅ Conclusion
Bulk importing accounts is a powerful feature designed to save you time and reduce manual input errors. By following the correct format and ensuring your data is well-prepared, you can import hundreds of accounts in just minutes. If you encounter issues, double-check your CSV file against the requirements and use the sample file as a reference. For best results, always validate your data before uploading.