This guide explains how to properly report an error or bug to Support so the issue can be reviewed, reproduced, and resolved as quickly as possible. Providing complete and accurate information helps reduce back-and-forth and speeds up troubleshooting.
When to Report a Bug
Please report a bug when you experience:
- An error message or warning
- A feature not working as expected
- A crash or frozen screen
- Unexpected behavior after an action
Required Information for All Bug Reports
When submitting a bug report, all of the following are required:
- Short Description of the Issue
- What were you trying to do?
- What happened instead?
- Steps to Reproduce
- List the exact steps taken before the error occurred
- Be specific (buttons tapped, pages opened, actions performed)
- Device & Environment Details
- Device type (e.g., iPhone, Android)
- OS version
- App version (if applicable)
-
Snapshot Files (Required)
Snapshot files allow Support to verify the error and confirm the correct files were sent.
How to Capture Snapshot Files (Enhanced Setup)
⚠️ Important
Snapshot files must be captured correctly. If they are incomplete or incorrect, Support may be unable to investigate the issue.
Before You Begin
Ensure the following before capturing the snapshot:
- The page or pop-up displaying the error is fully visible on the phone screen
- The snapshot is captured before closing the error message or the app
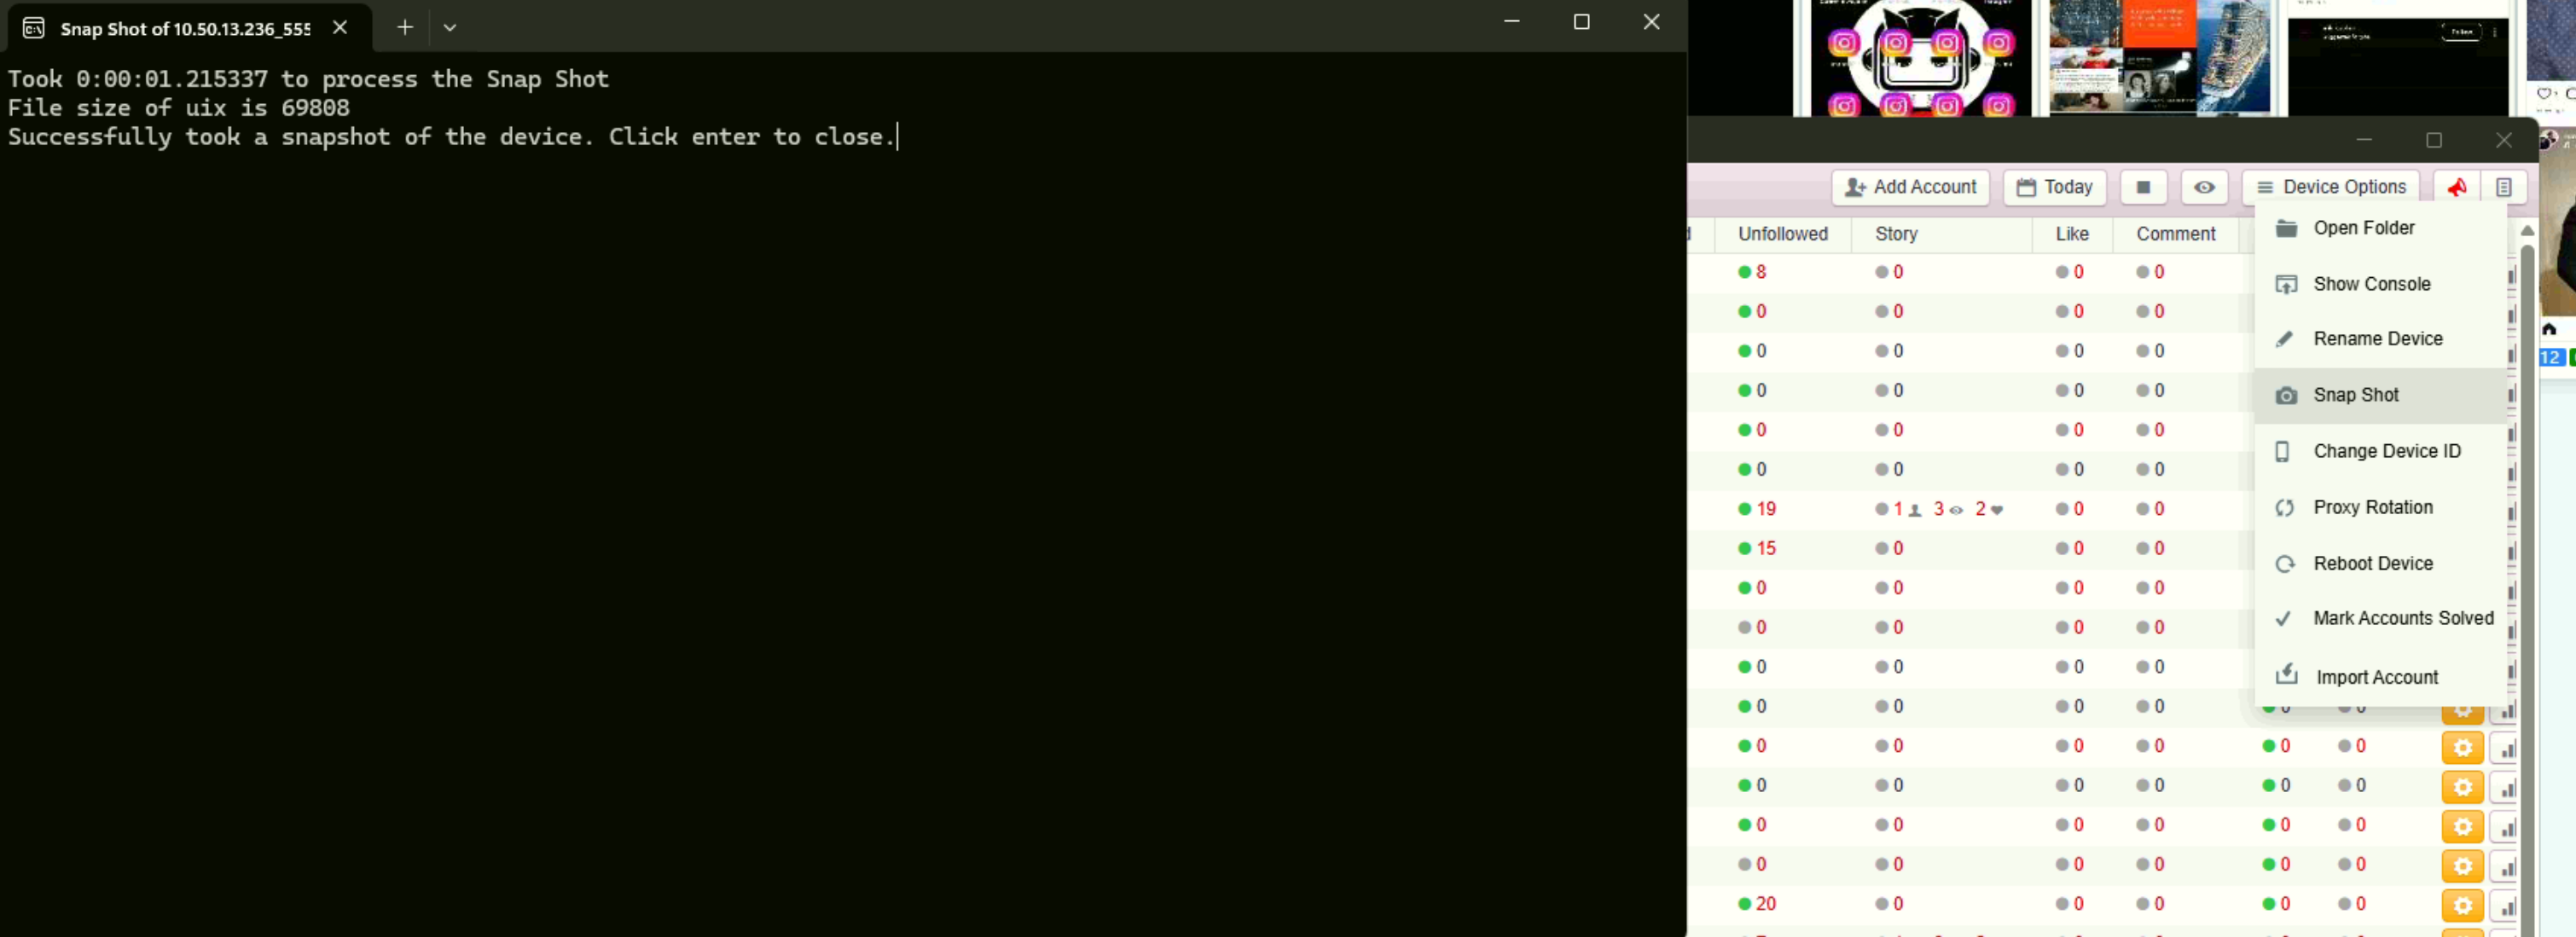
Steps to Capture Snapshot Files
-
Navigate to the screen where the error occurs and leave the error visible
(Do not dismiss the pop-up or exit the app.)
-
Select the Snapshot option to generate the snapshot files.

- A black screen will briefly appear during the capture process.
- When prompted, press Enter to close the black screen and complete the snapshot.
📌 Key Requirement
The snapshot must clearly display the reported error message. This allows Support to:
- Verify that the correct issue is being investigated
- Confirm that the appropriate snapshot files were generated and submitted
✅ Snapshots that do not show the error may require re-capture.
Files That Will Be Generated
When a snapshot is captured correctly, two files are automatically generated. Both files are required for Support to investigate the issue.
1. Image File (PNG)
- Displays the screen with the visible error message
- Used to visually confirm the reported issue
2. UIX File
- Contains technical diagnostic data used for debugging
- Must correspond to the same error shown in the image file

How to Submit the Files
- Select both the PNG and UIX files
- Right-click and choose Create ZIP file

Once the ZIP file is created, copy and send it to Support

⚠️ Both files are required.
If either file is missing or does not match the reported error, Support may request a new submission.
Final Checklist Before Submitting
Before sending your report, confirm:
- ✅ Error message is visible on screen
- ✅ Snapshot was taken before closing the page or pop-up
- ✅ Both image and UIX files were generated
- ✅ Files match the reported issue
Need Help?
If you are unsure whether your snapshot was captured correctly, contact Support before submitting the report.