🧠 Overview
The Clone Detector is the Onimator Helper Suite’s multi-account-per-device deployment tool. It:
- Connects to your phones via ADB.
- Scans them for Instagram clones (cloned IG apps created by NomixCloner / similar tools).
- Distributes a list of accounts across the detected clones, one account per clone.
- Deploys the result into Onimator’s account settings, so each clone has an account assigned and is ready to run.
Settings let you control which package names count as “Instagram clones” (the detection patterns).
💡 Strategic Purpose: If you’re running many Instagram accounts on a single phone via app clones, this tool replaces the manual “open Onimator → add account → set App Cloner → paste package name” loop. Detect the clones once, paste a username:password list, and let Clone Detector wire them up.
🛠️ Pipeline at a Glance
Device Connection  →  App Scanner  →  Account Deployment  →  Onimator runs
    (ADB)               (find clones)      (assign accounts)
       ↑
   Settings — controls what counts as an "Instagram clone"
📌 You must connect a device first. The other sub-tabs depend on a live ADB connection.
🚀 Key Features
- ADB-based Device Connection — auto-detect or manual ADB path.
- Instagram Clone Scanning — finds all cloned IG packages installed on connected device(s).
- Multi-Device Scan — option to scan every connected device in one shot.
- Filter Noise — skip system apps, skip general-purpose clone apps, focus on unused App IDs only.
username:passwordAccount Parser — paste a list, let the tool distribute.- Preview Before Deploy — see exactly which account lands on which device + App ID before committing.
- Custom Detection Patterns — define your own package-name fragments that should be treated as Instagram clones.
- Database Export — export the suite’s internal DB for outside viewing / debugging.
⚙️ Access the Clone Detector
- Open the Onimator Helper Suite.
- In the suite’s header, click Select Bot Folder and point at your Onimator bot folder.
- Click the Clone Detector tab in the top tab row.
- You land on the Device Connection sub-tab. Set ADB and connect a device before moving on.
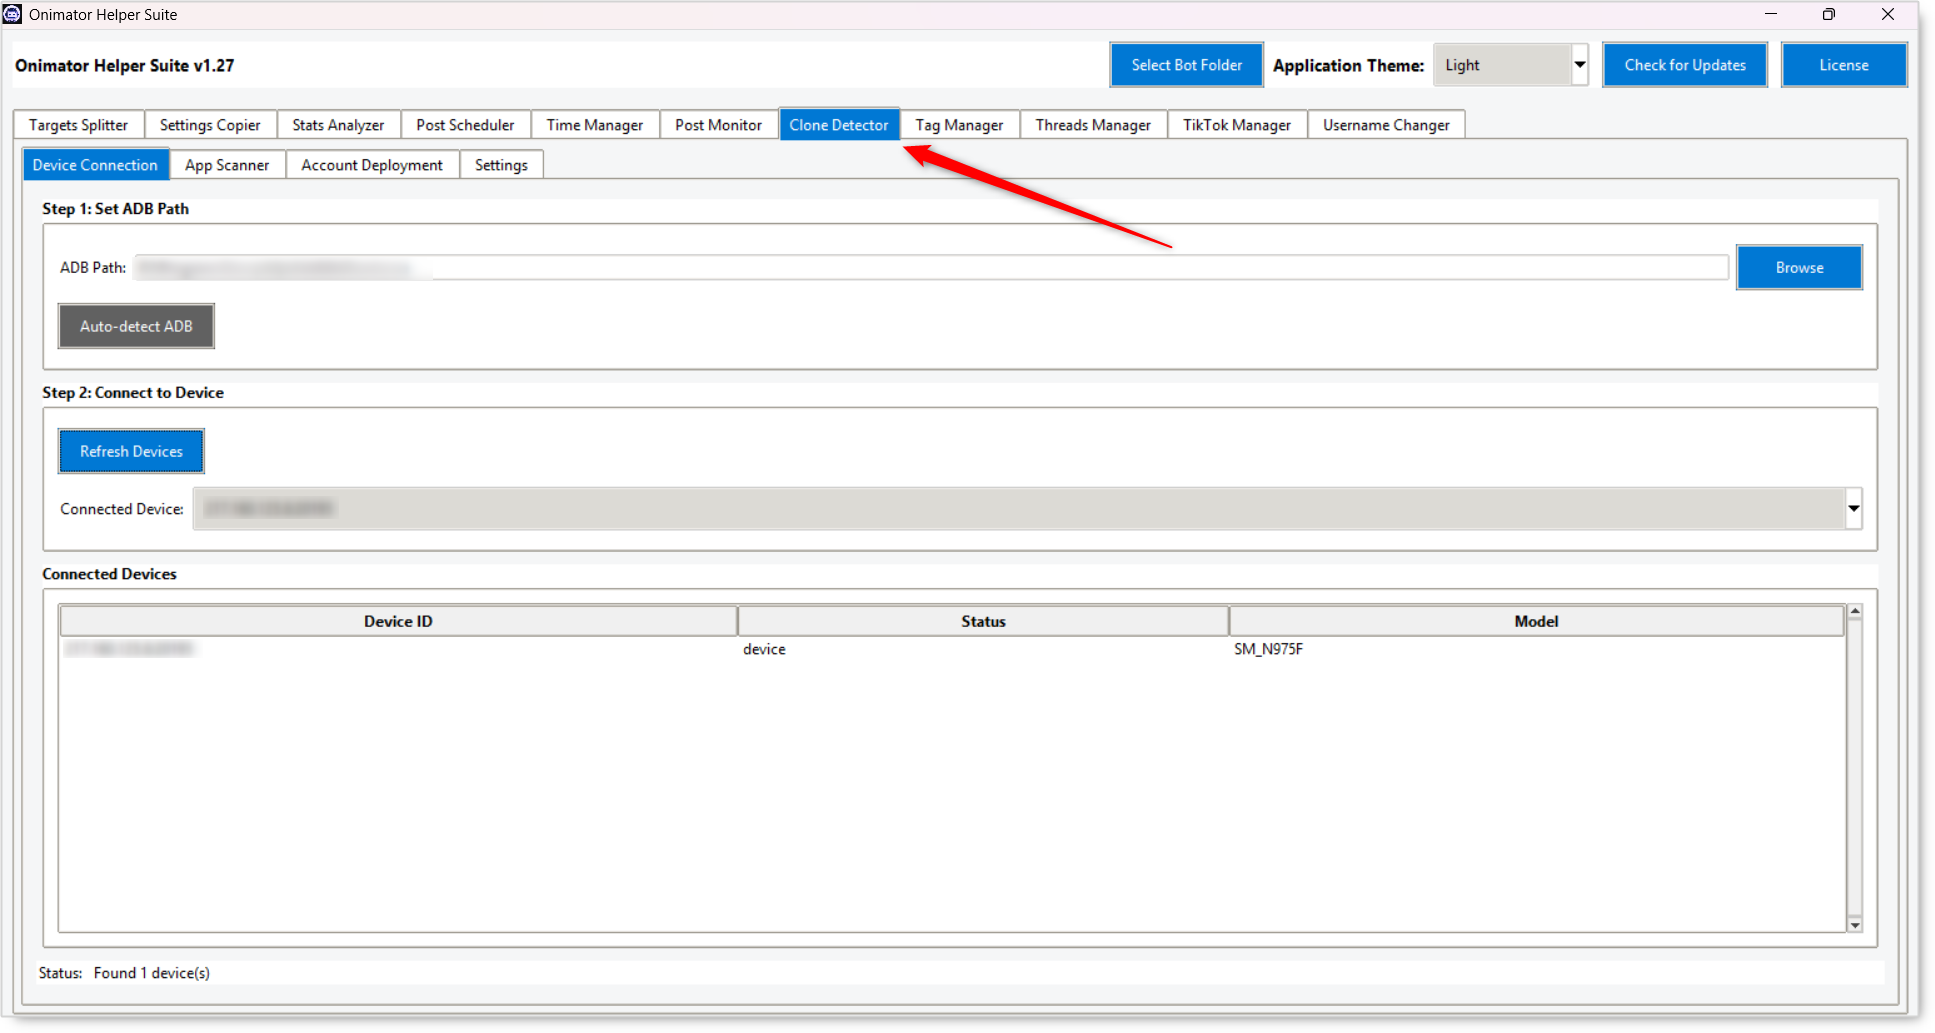
🔧 Sub-Tab 1: Device Connection
⚠️ This is the precondition for everything else. The App Scanner, Account Deployment, and Settings sub-tabs assume there’s at least one connected device.
Step 1: Set ADB Path
ADB (Android Debug Bridge) is how the suite talks to your phones.
- ADB Path (text field + Browse button) — point at your
adb.exe. - Auto-detect ADB (button) — tries to find ADB on its own. Use this first; only Browse manually if auto-detect fails.
Step 2: Connect to Device
- Refresh Devices (button) — re-scans for connected phones via ADB.
- Connected Device (dropdown) — pick the phone to work with.
Connected Devices (table)
Lists every phone ADB sees, with status info.
| Column | What it shows |
|---|---|
| Device ID | Hardware ID. |
| Status | Connection state (device, unauthorized, offline, etc.). |
| Model | Phone model name. |
Status Line (footer)
At the bottom of the sub-tab, e.g. “Not connected to any device.” / “Connected to R58N34VNGJW.” — quick sanity check.
🔧 Sub-Tab 2: App Scanner
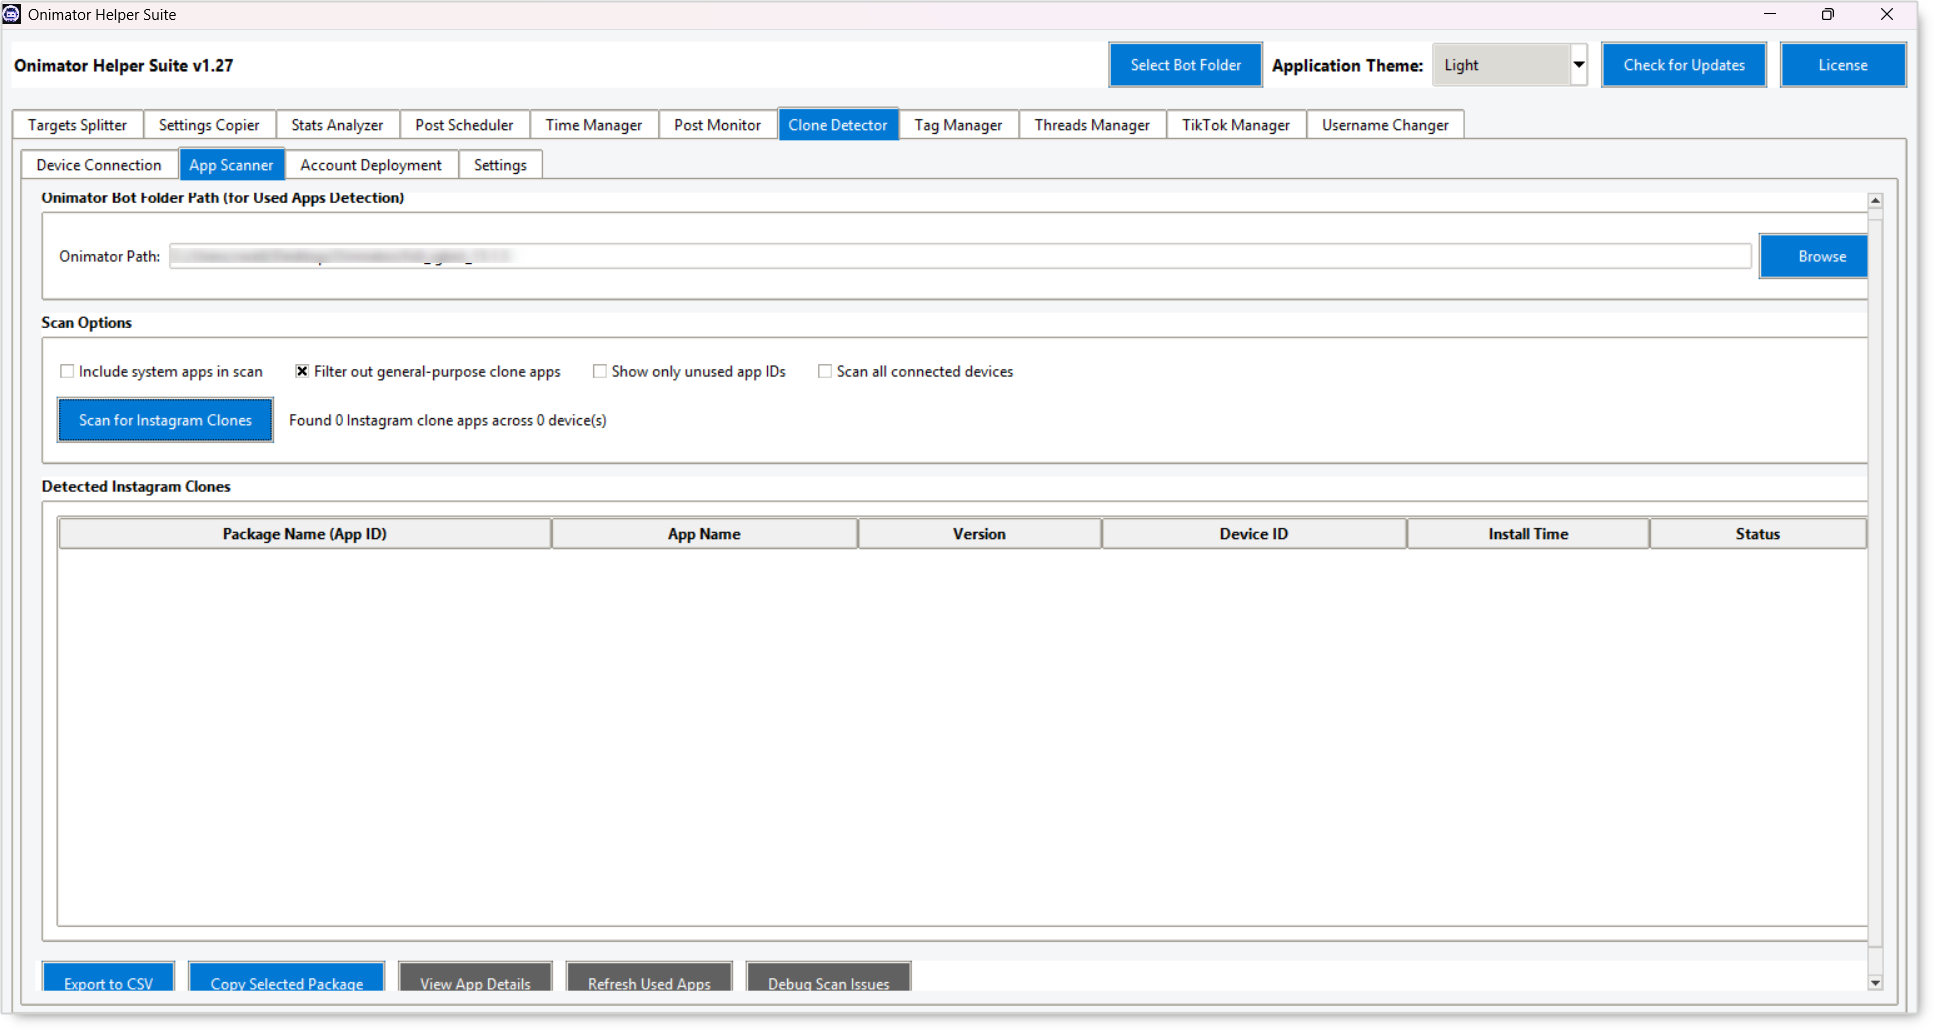
Once a device is connected, scan it for Instagram clones.
Onimator Bot Folder Path (for Used Apps Detection)
- Onimator Path (text field + Browse button) — points at your Onimator install. Needed so the scanner knows which App IDs are already assigned to accounts (so it can flag the unused ones).
Scan Options (checkboxes)
- Include system apps in scan — by default the scanner skips system apps; tick to include them.
- Filter out general-purpose clone apps (checked by default) — hides cloner-frame apps that aren’t actually IG instances.
- Show only unused app IDs — narrows the result to clones that don’t yet have an account assigned in Onimator.
- Scan all connected devices — runs the scan across every connected phone instead of just the selected one.
Scan for Instagram Clones (button)
Runs the scan based on the options above.
Detected Instagram Clones (table)
| Column | What it shows |
|---|---|
| Package Name (App ID) | The Android package the clone runs as. |
| App Name | Display name of the clone. |
| Version | Installed version. |
| Device ID | Which phone the clone is on. |
| Install Time | When it was installed. |
| Status | Used / Unused / etc. |
Action Buttons (bottom row)
- Export to CSV — saves the detected-clones list as a CSV.
- Copy Selected Package — copies the highlighted row’s package name to clipboard.
- View App Details — opens an info panel on the highlighted clone.
- Refresh Used Apps — re-reads Onimator to refresh the “used / unused” status.
- Debug Scan Issues — diagnostics panel for when the scan misbehaves.
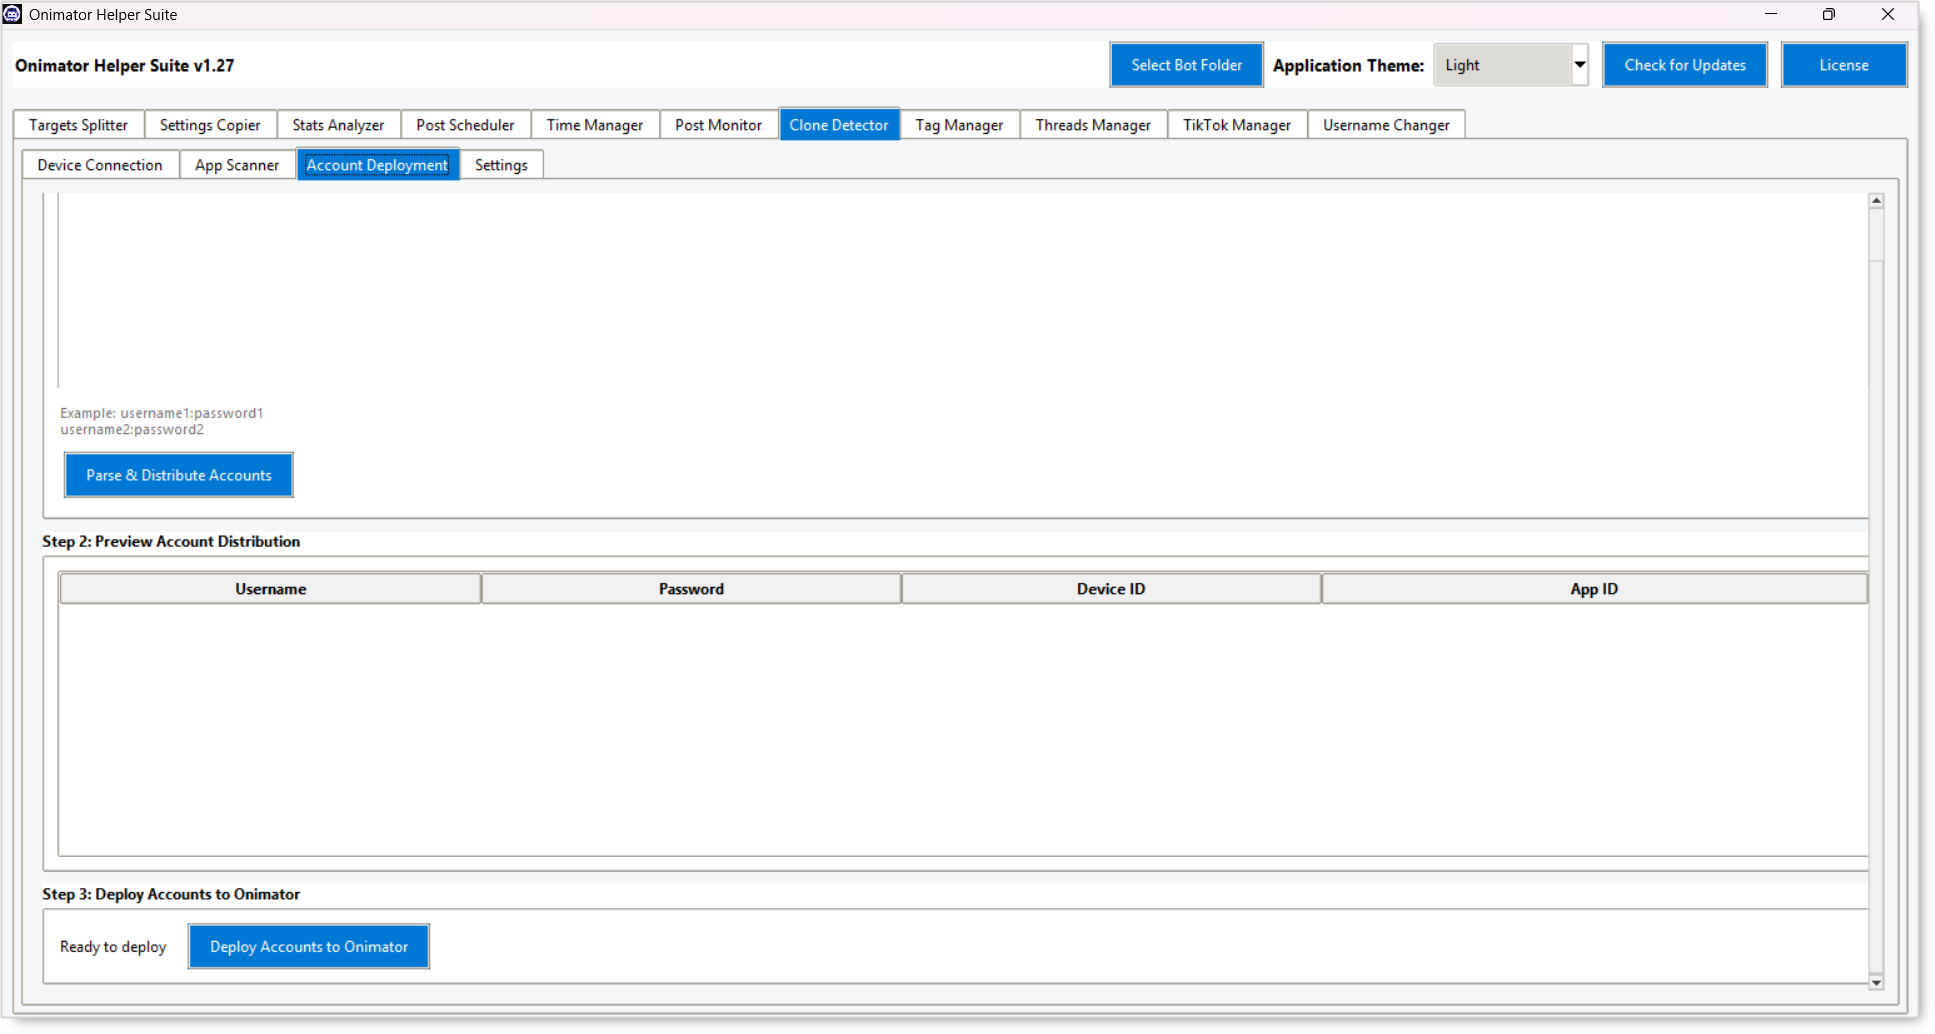
🔧 Sub-Tab 3: Account Deployment
 Once you have a list of clones, this tab assigns accounts to them.
Step 1: Enter Instagram Accounts (username:password format)
A large text area. One account per line, username:password format.
Placeholder example shown in the UI:
username1:password1
username2:password2
- Parse & Distribute Accounts (button) — reads the textarea, distributes the accounts across detected clones, and populates the preview table.
Step 2: Preview Account Distribution
A table showing how the parsed accounts will be assigned before you commit anything.
| Column | What it shows |
|---|---|
| Username | Instagram handle. |
| Password | The matching password. |
| Device ID | Which phone this account will deploy to. |
| App ID | Which Instagram clone on that phone. |
Use this as your sanity check, every row should make sense (right username on the right device on the right clone) before you click Deploy.
Step 3: Deploy Accounts to Onimator
- Status — text shows
Ready to deployonce Step 1–2 are valid. - Deploy Accounts to Onimator (button) — writes the preview rows into Onimator’s account settings (creates / updates each account with the right username, password, App ID, and device assignment).
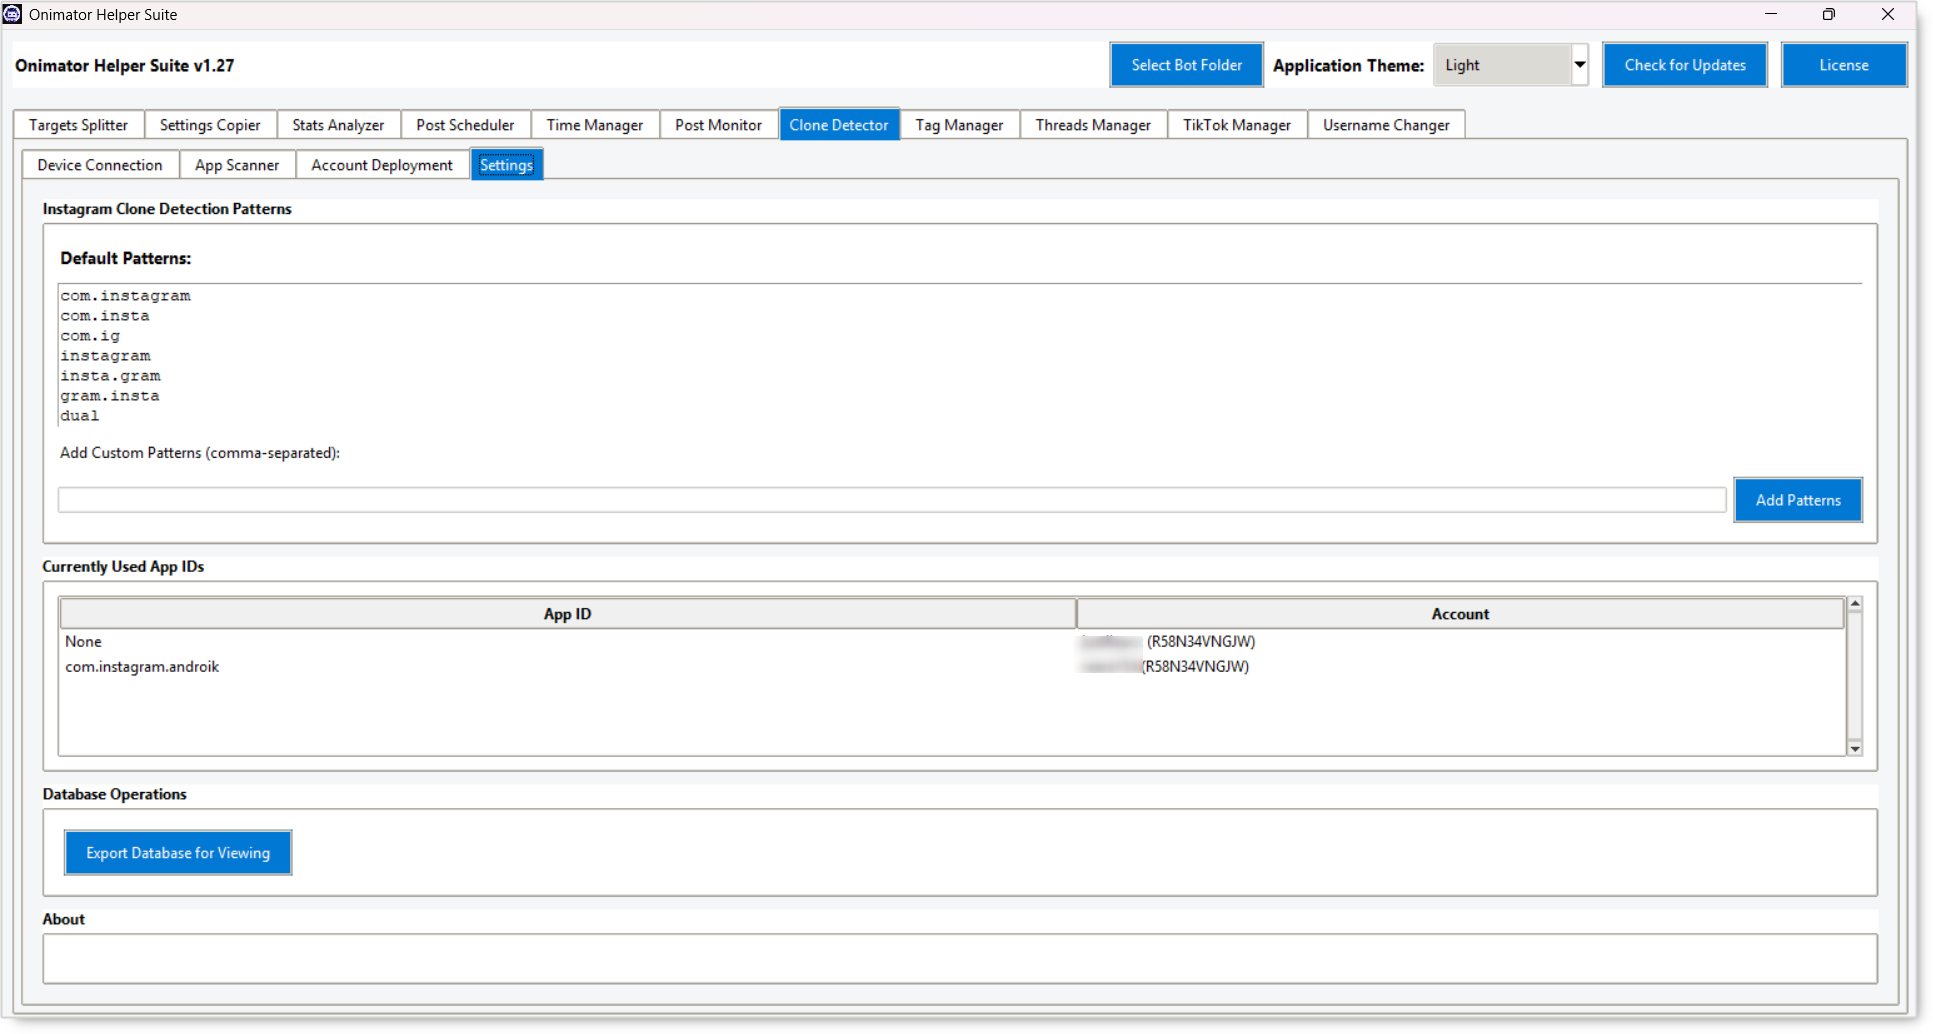
🔧 Sub-Tab 4: Settings
 Controls what the App Scanner counts as an “Instagram clone.”
Instagram Clone Detection Patterns
Default Patterns (read-only list)
The package-name fragments the scanner already looks for:
com.instagram
com.insta
com.ig
instagram
insta.gram
gram.insta
dual
If a package name contains any of these, the scanner flags it as a clone.
Add Custom Patterns (comma-separated) (text field + Add Patterns button)
Have a clone that uses a non-standard package prefix? Add your own patterns here (comma list) and click Add Patterns.
Currently Used App IDs (table)
Lists every Instagram App ID that’s already mapped to an account in Onimator, useful for spotting which clones are taken vs. open.
| Column | What it shows |
|---|---|
| App ID | The clone’s package name. |
| Account | Which Onimator account is using it. |
Database Operations
- Export Database for Viewing (button) — exports the suite’s internal DB so you can inspect it externally.
About (section at the bottom)
Read-only product / build info.
📅 Recommended Workflow
First-Time Multi-Account Deployment on a New Phone
- Device Connection → Auto-detect ADB → confirm the phone shows up under Connected Devices.
- App Scanner → set Onimator Path → tick Show only unused app IDs → click Scan for Instagram Clones.
- Review the Detected Instagram Clones table. If you expected 10 clones and see 7, something’s off, check NomixCloner before continuing.
- Account Deployment → paste your
username:passwordlist (one per line) → Parse & Distribute Accounts. - Step 2: Preview — sanity-check every row.
- Step 3 → Deploy Accounts to Onimator.
Add Accounts to Already-Provisioned Clones
- Connect device.
- App Scanner → tick Show only unused app IDs → scan.
- Account Deployment → paste only the new
username:passwordlines → Parse → review → Deploy.
Add a Custom Clone Pattern (e.g., your cloner uses an unusual package prefix)
- Settings → type the pattern in Add Custom Patterns (comma list if multiple).
- Click Add Patterns.
- Go back to App Scanner → re-scan. The new package(s) should now show up in the detected list.
Audit: Which Clones Are Still Empty?
- Settings → check Currently Used App IDs. Anything not on that list is an open slot.
- Or App Scanner → tick Show only unused app IDs → re-scan.
🔐 Best Practices
Always Connect a Device First
The whole pipeline depends on a live ADB connection. If Device Connection’s status line says “Not connected to any device,” nothing else will work meaningfully.
Use Auto-detect ADB Before Browsing Manually
The Auto-detect button finds ADB in standard locations. Manual Browse is the fallback when auto-detect fails.
Tick “Show only unused app IDs” When Provisioning
It hides clones that already have an account, so the deployment doesn’t accidentally overwrite an existing assignment.
Always Review Step 2 (Preview) Before Deploying
The preview is your last chance to catch a wrong username on the wrong clone. Skip the review and you may end up running Account A on the clone you’d reserved for Account B.
Keep Account Passwords in a Safe Place
The textarea takes username:password lines, those are credentials. Don’t leave them in the textarea after deploy; clear it.
Add Custom Patterns Once, Per Cloner
If you switch to a new cloner with non-standard package names, add its patterns to Settings once. From then on, every scan picks them up automatically.
⚠️ Common Issues
“Not connected to any device” — But the Phone Is Plugged In
Cause: ADB isn’t authorized on the phone, or the ADB path is wrong. Fix: On the phone, accept the “Allow USB debugging?” prompt. Then Refresh Devices. If still nothing, re-check ADB Path (try Auto-detect ADB).
App Scanner Returns 0 Clones
Cause: No clones installed yet, OR the scanner doesn’t recognize your cloner’s package prefix. Fix: Check NomixCloner (or whatever cloner you use) to confirm clones exist. If they do, go to Settings → add your cloner’s package prefix to Add Custom Patterns → re-scan.
Parse & Distribute Says “0 Accounts Distributed”
Cause: Either the textarea is empty / malformed, or there are no detected clones to assign to. Fix: Confirm each line is username:password with the literal colon. Re-run App Scanner to confirm there are unused clones available.
Deploy Says “Ready to deploy” but Nothing Lands in Onimator
Cause: Onimator path isn’t set on the App Scanner sub-tab, or the bot folder in the suite header doesn’t match the one App Scanner used. Fix: Confirm both paths point at the same active Onimator install, then re-run from Step 1.
A Clone Doesn’t Show Up Even After Adding a Custom Pattern
Cause: Pattern is wrong (typo / case mismatch), or “Filter out general-purpose clone apps” is hiding it. Fix: Double-check the package prefix exactly as it appears on the device. Try unchecking the filter, re-scan, then re-tick once you’ve confirmed.
🏁 Conclusion
- Four-step pipeline — Device Connection → App Scanner → Account Deployment → (Onimator runs).
- Connect a device first — everything else depends on it.
- Scanner finds Instagram clones on the connected device(s) based on package-name patterns.
username:passworddeployer distributes a list of accounts across detected clones in one click.- Settings let you extend detection with custom patterns for non-standard cloners.
💡 Implementation Tip: Pair this with NomixCloner: create 10 clones in NomixCloner → switch to Clone Detector → scan → paste your 10-account username:password list → preview → deploy. The whole multi-account-per-device provisioning workflow takes minutes instead of an hour of manual Onimator clicks. Save your username:password list in a password manager, don’t leave it in the textarea after deploy.
🎥 Tutorials & Support
- No transcript for this module yet — article built from UI screenshots only.
- Telegram Support: Join Onimator Support